Creating and Sending a Quiz
It's easy to get started creating Quizzes for your classes. Once you have created the Quiz, then you need to send the Quiz to your class so they can complete the Quiz.
Note: If you send a Quiz to one student or a Small Group, rather than the whole class, the results will not be added automatically to your gradebook. You will have to navigate to the Quiz results in your communication stream and then manually enter the grades into your gradebook.
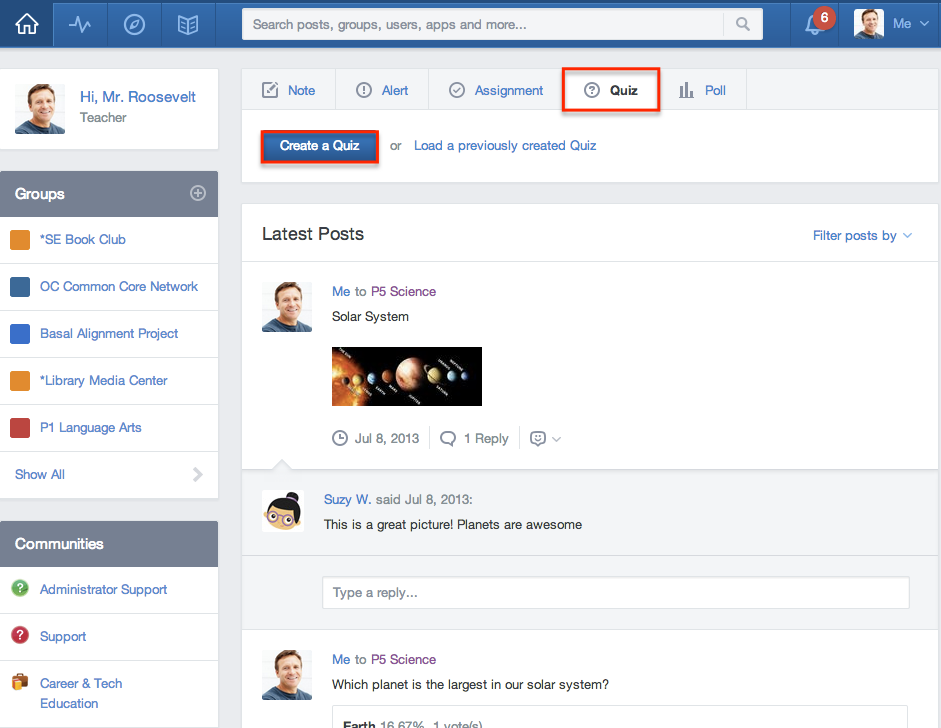
- Select the “Quiz” tab located in the post bubble at the top of your Edmodo Homepage.
- Click “Create a Quiz” to create a new Quiz or follow these instructions if you are loading a previously created Quiz.
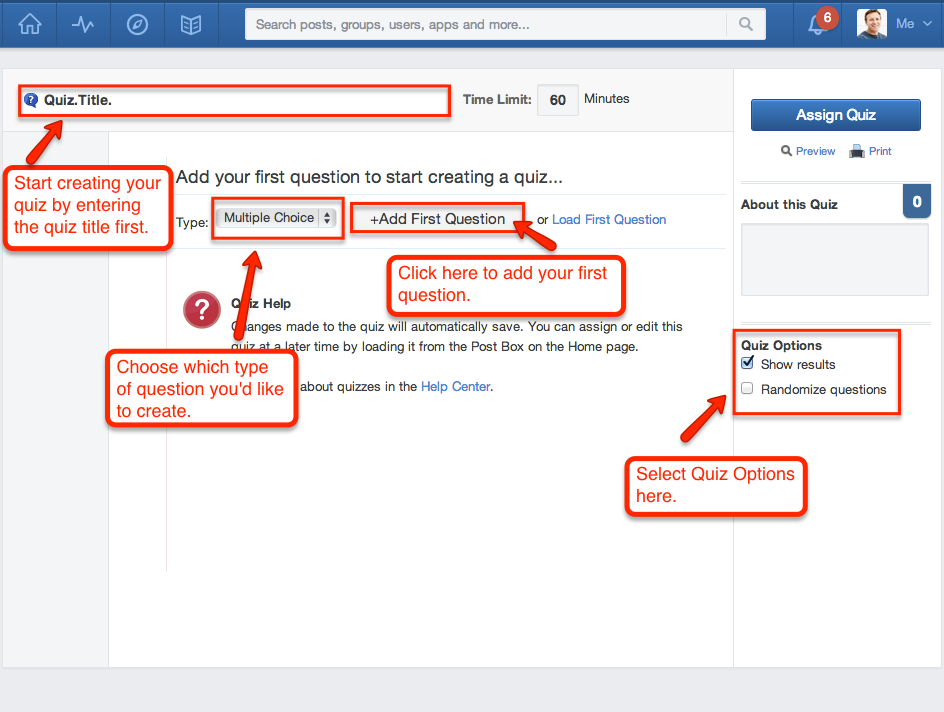
- Fill in the following details of your Quiz, starting with Quiz Title:
- Quiz Title - name your Quiz by completing the title field at the top.
- Time Limit - set a time limit for students to complete the Quiz, maximum time limit is 1440 minutes or 24 hours.
- Description - complete the “About this Quiz” field on the right panel to describe the Quiz
- Results - check the box under “Quiz Options” to show students their immediate Quiz results
- Random - check the box under “Quiz Options” to randomize questions for each student taking the Quiz
- Select the question type from the Type drop-down. Choose from multiple choice, true/false, short answer, fill in the blank or matching. (You may also click the “Load First Question” link to the right to load a previously created question from your question bank.)
- Click the “+Add First Question” button and type in the question in the “Question Prompt” field. (Below you will see the option to attach any links or files to the question).
- Add responses. The response fields will vary depending on the type of question. (For Fill in the Blank use ‘_’(underscores) to specify where you would like a blank to appear in the question. Complete the response options and mark the correct one by selecting the “Set As Correct Answer” link.) By default, you have two response fields, if you want to add more, click the "Add Response" button below the second response field, to add more responses.
- Change the “Point” field if you would like to weight the question (the question is automatically set to 1 point, but you can set it to a higher number to give it more weight)
- Select the “+” button on the left side panel to add a new question. You can go back and edit questions, by selecting the question number from the left panel. Click the "Load" link next to the "+" button to load previously created questions.
- Select the question number in the left side panel and click the “Remove Question” button from the top right corner to delete a question.
- Drag ‘n drop the question numbers on the left side panel to reorder the questions.
- Select the “Preview Quiz” link under the “Assign Quiz” button to preview the Quiz (just as a student would see it).
- Select the "Print" link to print a hard copy of the Quiz, you can give this to students to complete.
- Click the “Assign Quiz” button at the top right corner of the page to post the Quiz.
- Select a due date by clicking in the due date field or on the "Edmodo Planner" icon.
- Check Add to Gradebook to automatically add it to your gradebook, if you forget this step you can add it to your gradebook later.
- Choose to Send Now or Scheduled:
- Send Now – will send the post immediately
- Scheduled - will automatically send the post at the chosen time (make sure the timezone settings are the same for teachers and students.)
- Select “Send” to post the Quiz.
Note: If you send a Quiz to one student or a Small Group, rather than the whole class, the results will not be added automatically to your gradebook. You will have to navigate to the Quiz results in your communication stream and then manually enter the grades into your gradebook.